Welcome, baseball families! Stepping onto the diamond for the first time is a thrilling adventure for both kids and parents.
That wall of bats, gloves, and helmets, though, can feel overwhelming. We’ve been there, staring at a sea of options without a clear starting point.
This friendly resource is here to translate the baseball gear language. We’ll help you cut through the noise and focus on what your player truly needs to be safe, confident, and have a blast.
Drawing on advice from seasoned coaches and players, we’ll show you how to prioritize the essentials. The goal is to make smart, cost-effective choices without overspending on items that won’t get used.
We’ll clarify what your club typically provides versus what you need to bring. For a great head start, check out this comprehensive tee ball checklist for youth baseball.
Whether you’re prepping for a first season or planning an upgrade, this guide is your playbook. Let’s get your player geared up for success.
What the Club Provides vs What Families Bring
Families often wonder what gear their Stix team will provide. The answer varies by age, league rules, and team budget. It’s different for everyone.
Your Stix team will likely give you some shared gear for practices and games. This includes batting helmets and catcher’s gear. They might also have a few “team bats” for players who forget theirs.
While sharing gear is convenient, owning your own has its benefits. Hygiene is key. A helmet shared by many can spread germs. Plus, gear that fits just right can improve your player’s performance and safety.
So, what do families need to buy? You’ll likely need to get your player’s glove, bat, cleats, uniform pants, and protective gear like an athletic cup. Choosing the right bat is critical, and understanding USA and USSSA bat stamps is the first step.
Before buying a bat, check if it has the right USA/USSSA bat stamps for your league. A bat with the wrong stamp won’t be allowed in games. Your coach or league director can tell you which stamp you need.
Here’s a quick breakdown of the common equipment split:
- Typically Club-Provided: Team batting helmets, shared catcher’s gear (chest protector, shin guards, helmet), practice baseballs, and sometimes game bats.
- Always Family-Purchased: Fielding glove, baseball bat (with correct stamp), cleats or turf shoes, uniform pants, belt, socks, athletic supporter/cup, and a gear bag.
For serious catchers, even if the team provides gear, getting your own is a good idea. It ensures a perfect fit and proper care. The same goes for helmets and bats. Having your own means no last-minute scrambling.
The best plan is to talk to your coach at the start of the season. Get a clear list of what the team will supply. Then, you can build your personal list with confidence, starting with a bat that has the right USA/USSSA bat stamps for your league.
Bat Basics: stamps, drop weights, length/weight match by age and strength
Understanding bat certifications and weights is key to a smart purchase. Just like finding the right glove sizing, the right bat is essential for a player’s swing and confidence.
Every legal bat has a certification mark. This mark shows it meets safety and performance standards. You’ll see USA, USSSA, and BBCOR stamps.
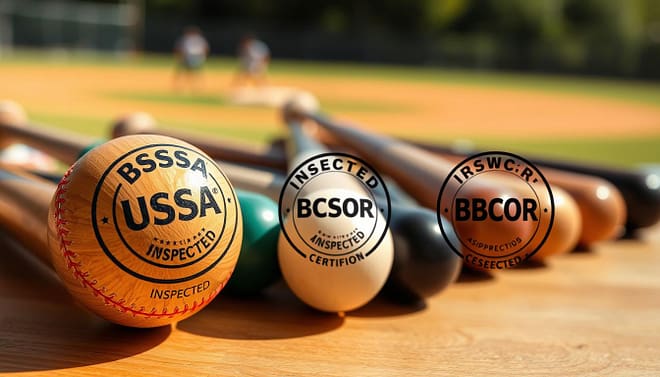
Choosing the wrong stamp means your player can’t play. Here’s a quick guide to the right stamp for your player.
| Stamp | Governing Body | Typical Leagues | Age / Level | Key Notes |
|---|---|---|---|---|
| USA | USA Baseball | Little League, Cal Ripken, Babe Ruth | Youth, ages 5-14 | Standard for most youth recreational leagues. Has a softer performance threshold. |
| USSSA | United States Specialty Sports Association | Travel ball, USSSA tournaments | Youth & High School | Often called “tournament bats.” Known for a hotter, more powerful “pop” off the barrel. |
| BBCOR | National Federation of State High School Associations (NFHS) | High School, NCAA, NFHS leagues | High School & College | Mandatory for high school varsity play. Reduces the “trampoline effect” for safety. |
Next, learn about drop weight. It shows how light the bat feels. It’s the difference between the bat’s length and its weight.
A bat labeled 30 inches long and 20 ounces heavy has a -10 drop weight (30 – 20 = 10). A lower number means a heavier bat.
Common drops are -10, -8, -5, and -3. Younger, smaller players use higher drops like -10 for easier swing speed. Older, stronger players move to -8, -5, or -3 for more power.
Finding the right length and weight is a balance. A bat that’s too long or heavy hurts swing control. One that’s too light won’t generate power.
Use this simple method. Have your player hold the bat by the knob, extending their arm sideways. If they can’t hold it steady for 30 seconds, it’s too heavy.
Also consider their height and strength, not just age. A tall, strong 10-year-old might handle a 31-inch, -8 bat, while a smaller peer needs a 30-inch, -10.
| Player Age & Strength | Recommended Drop Weight | Typical Length Range | Swing Focus |
|---|---|---|---|
| Ages 5-7 (Beginner) | -10 to -12 | 26″ – 28″ | Making contact, building confidence. |
| Ages 8-10 (Developing) | -10 to -8 | 28″ – 30″ | Improving swing speed and mechanics. |
| Ages 11-13 (Intermediate) | -8 to -5 | 30″ – 32″ | Generating more power, league-specific stamps. |
| Ages 14+ (Advanced/High School) | -5 to -3 (BBCOR) | 32″ – 34″ | Power hitting with a regulated BBCOR bat. |
Finding the right bat is a process. It requires the same careful attention as glove sizing. The right bat feels like an extension of the player’s body, leading to better hits and more fun.
Always check your league’s rules first for the required stamp. Then, let your player’s strength and size guide the drop weight and length. This combination ensures a perfect fit.
Gloves That Fit: positions, break‑in, care and storage
Finding the right glove size and style can be tough for new baseball and softball families. With so many choices, it’s easy to get lost. Remember, a glove is your player’s most personal tool on the field.
A perfect glove fit is key. When your player tries on a glove, their fingers should reach the end of the finger stalls without cramping. The heel of the glove should sit snugly in the palm. A secure pocket builds fielding confidence with every catch.
Many youth leagues start players with a “utility” style glove. This is a great all-around option. As players grow and find their favorite position, a specialized glove can make a big difference.
Choosing by position helps performance. An infielder needs a quick transfer, while an outfielder needs to secure fly balls. Use this guide to find the right type.
| Position | Typical Size | Key Features | Special Notes |
|---|---|---|---|
| Infield | 10.5″ – 11.5″ | Shallow pocket, flexible leather | Allows for fast ball retrieval and throws. |
| Outfield | 12″ – 13″ | Deep pocket, longer length | Designed to trap fly balls securely. |
| First Base | 12″ – 13″ | Long, wide pocket, no fingers | Unique mitt style for scooping throws. |
| Catcher | 32″ – 34″ (circumference) | Extra padding, rounded pocket | Built to handle pitching speed and protect hand. |
The break-in process molds the glove to your player’s hand. Never use a microwave or oven. Good break-in takes patience but pays off.
Here is a simple, safe method:
- Apply a small amount of glove conditioner or oil to the palm and pocket.
- Place a baseball or softball in the pocket and wrap the glove with rubber bands.
- Have your player play catch regularly. The natural motion is the best break-in tool.
- For stiff spots, gently work the leather by opening and closing the glove.
Regular care keeps the leather supple and extends the glove’s life for many seasons. After games, wipe off dirt with a damp cloth. Let the glove air dry away from direct heat.
Every few weeks, apply a light leather conditioner. This prevents the leather from drying out and cracking. Avoid petroleum-based products that can make the leather too soft or greasy.
Proper storage is just as important. Always store the glove in a cool, dry place. Keep a ball in the pocket to maintain its shape. Never leave it in a hot car or damp bag.
Taking care of a glove ensures it’s ready for action. The same thoughtful approach applies to another vital piece of safety gear. Ensuring a proper helmet fit is just as critical for protecting your player at the plate and on the bases.
Helmets, C‑Gear, and Protective Options: fit checks and safety notes
Finding the right baseball helmet and protective padding can be tough. But, a good fit is key to staying safe. You shouldn’t buy gear for kids to grow into. A helmet or catcher’s gear that doesn’t fit right can move when hit, leading to injuries.
Every batting helmet must have the NOCSAE seal. This seal shows it meets high safety standards. The helmet should fit snugly but not hurt. Here’s how to check:
- The helmet should not rock forward, backward, or side-to-side on the head.
- The front brim should sit about one inch above the eyebrows.
- With the chinstrap fastened, only one or two fingers should fit between the strap and the chin.
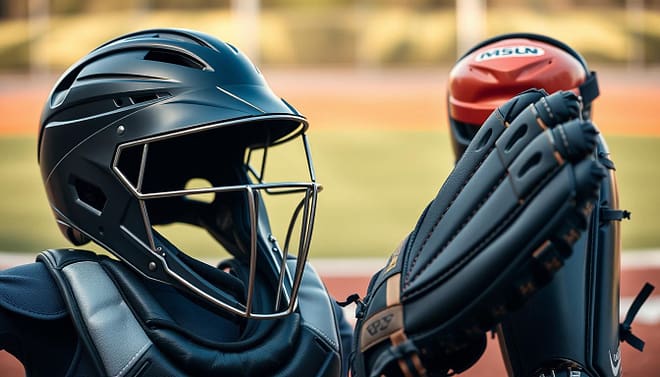
For catchers, a full set of catcher’s gear is a must. This includes a helmet with a faceguard, a chest protector, and leg guards. For new players, a boxed set is a good choice. It’s affordable and ensures everything fits right.
As players get better, families might buy separate pieces. This lets each item fit better, which is important for comfort and movement. It’s also important for young catchers to learn how to wear their gear right.
Other safety gear is important for all players. A mouthguard protects teeth and can help prevent concussions. A protective cup is needed for all male players. Some leagues also require face guards on batting helmets for younger players.
It’s best to get your player used to wearing all safety gear from the start. This makes wearing protection a normal part of playing. It lets them play with confidence and focus.
Cleats and Turf Shoes: when you need which
In youth baseball and softball, picking the right shoes is key. The right shoes help with quick starts, stops, and fielding. They keep players safe, follow league rules, and help them perform their best.
For grass and dirt fields, molded cleats are the standard. They have rubber, plastic, or TPU studs. These studs grip the ground, preventing slips.
It’s important to know: metal cleats are not allowed in youth leagues! They can cause serious injuries. Always check local rules, but metal cleats are usually banned until high school.
Look for cleats with rubber, turf-friendly, or TPU studs. These materials grip well without the risk of metal. They’re also affordable and last long for growing feet.
On artificial turf or indoors, turf shoes are best. They have short, rubber nubs for good grip without damaging the turf or feet.
Here’s a simple guide to help you decide:
- Molded Rubber/Plastic Cleats: Use for games and practices on natural grass and dirt fields. This is your primary game-day shoe.
- Turf Shoes: Use for practice or games on artificial turf, gym floors, or indoor training facilities.
- Comfort Slides/Sandals: Don’t forget post-game! A pair of slides or sandals for after the game lets feet air out and relax, making them a clubhouse essential.
Choosing the wrong shoe can lead to slips, falls, and discomfort. The right pair gives your athlete the confidence to play hard from the first pitch to the final out. Invest in the proper cleats for the field and a pair of turf shoes for the turf. Your player’s feet—and their coach—will thank you.
Labeling and Season‑Long Maintenance: cleaners, lace kits, seam fixes
Keeping gear organized is key for a successful season. Start by labeling every item with your player’s name. Use a permanent marker or iron‑on labels for hats, gloves, batting gloves, and water bottles. This simple step ensures gear comes home from team dugouts and shared league bags.
Regular maintenance protects your investment. For uniforms, treat dirt stains quickly with a stain remover like OxiClean or Tide Sport. A dedicated dirty laundry bag and extra socks in the tournament bag, as many travel teams recommend, keep things fresh.
Leather glove care is essential. Apply a small amount of conditioner, such as Lexol Leather Conditioner, a few times a season to keep the pocket supple. Check and tighten loose glove laces to maintain a secure fit.
Inspect cleats for worn‑down studs and replace them with a cleat repair kit. Look for small seam tears on bags or uniforms and mend them with a simple stitch or adhesive patch. This proactive maintenance extends the life of all equipment.
These easy routines make a big difference. Your player will look sharp, feel confident, and be ready for every inning with gear that performs from opening day to the final out.